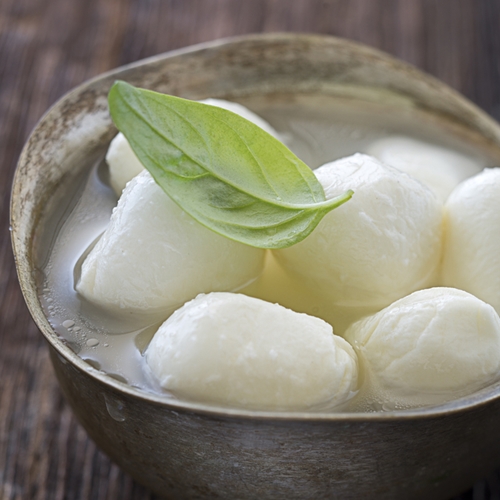
You can shape mozzarella into minuscule balls, a log or one large section, depending on how you plan to store it and what you are going to use it for.
Mozzarella is one of the most versatile cheeses on the planet. It’s mild taste and supple texture make it great for use in many dishes, as a spread and even on it’s own. While attending chef schools in Texas, you may want to experiment with making your own cheese – and mozzarella is a great place to start. Instructables user mikemwa shared this recipe that makes about 16-18 ounces of cheese.
1. Gather your equipment and ingredients
To make mozzarella, you will need:
- Measuring cups
- Large mesh strainer
- Long, sharp knife
- Large bowl
- Small bowl
- Slotted spoon
- Digital thermometer
- 8 quart stainless steal or enameled post
- Microwave
As well as:
- 1 gallon of fresh milk (preferably locally-sourced)
- 2 teaspoons citric acid, divided into individual teaspoons
- 1-2 teaspoons of salt
- 1/2 cup tap water, divided into two
2. Pour 1 teaspoon of citric acid into a 1/4 cup of water.
Stir the two. Crush the Rennet tablet and pour it into the other half of the water. Continue to stir. The Rennet will dissolve almost completely.
3. Warm the milk in the pot to 50 degrees.
Add the citric acid/water mix and stir. After a minute, add the rest of the citric acid. At this point, the milk should begin to curdle, getting lumpy and losing it’s smooth surface.
4. Heat this mixture to just below 88 degrees Fahrenheit.
If you go over this temperature, the Rennet will not create curds and your mix will be useless.
5. Once at 88 degrees, turn off the stove and cover the milk mixture.
Wait about 20 minutes and then stick a knife into the top to see if you can get a clean break. If the mix is ready, your knife will not have much residue on it.
6. Use a knife to reach all the way to the bottom of the pan while cutting the mix into 1/2 inch cubes from the very top of the mix through to the bottom of the pan, perpendicular to the earth.
Repeat this process at a 45 degree angle to fully cut up the cheese mix.
7. Allow the curds to sit for 5-10 minutes without disturbing them.
Then, use the thermometer and reheat the curds at a low setting until the temperature is 108 degrees. Continually stir the curds so they separate. As they heat up, the pieces will shrink and a liquid called whey will form.
8. Turn the stove off.
For 20 minutes, continue stirring the mix. The cheese curds will get smaller and smaller as the amount of whey increases. Next, use a strainer to remove the solid parts. Place them in a separate bowl, then use the large strainer to drain them even further. Let the curds sit in the strainer until no more liquid comes out. You may need to wait 10-15 minutes. Move the curds to a smaller bowl and use your fingers to break them into smaller pieces.
9. Microwave the curds.
This is the potentially tricky part. You need to heat the curds, but not too much. In order to do so, try short blasts of about 10 seconds on high. The curds will release more whey. If they start to turn to mush, stop. You’ll want to heat it about 35 seconds total. Short times will help you keep the mix usable and not go over time.
10. Use the slotted spoon or your fingers to gently squeeze the remaining whey from the curds.
Pour the whey into the sink or keep it for other culinary projects. Now re-microwave the curds in short five second bursts. Go to about 15 seconds so there is more whey coming out of the curds. Separate the solids from the whey and lightly work the curds into a ball.
11. Microwave the mix one more time for 20 seconds.
Add the salt and use your hands to stretch the curds. Kneed the cheese like bread until it looks uniform and stretches nicely. There shouldn’t be any visible lumps. Now shape the mix into a smooth ball and you have one personally created, delicious ball of mozzarella.
The recipe creator recommends storing the cheese in a plastic bag once you’re done, which will help it keep for 6-10 days. He uses the whey from this process to create ricotta cheese.