Winter chills can bring down the mood, even in relatively warm climates like Austin. One way students learning the art of baking can bring cheer to friends, classmates or customers is through creative and tasty desserts that brighten the day. Try these techniques to create fun desserts any time of year:
Cut-out pie crust
Pies can be tailored to any season using fruits, vegetables and flavors to reflect the time of year. Adding decorative elements like cutouts give your pies a unique presentation.
Begin with a pie crust; Ina Garten writes on Food Network to mix cold, diced butter and cold vegetable shortening with sugar, flour and salt. When the butter is in pea-sized crumbles, slowly add ice water. Once the dough forms a ball, wrap in plastic and chill for a half hour.
Fun cut-outs adds interest to your pie crust.When you’re ready to make the pie, remove dough from the fridge, divide in half and roll out to about a quarter-inch thickness. Sandwich the round between sheets of parchment paper, chill, and begin rolling out the second half. Cut out shapes from this round. For a more rustic look, feel free to hand-cut small ovals, hearts or stars; if you want more precision, use small cookie cutters. Stay closer to the center, and cut at least two inches from the edge. Place the cut-out round between sheets of parchment paper and keep in the refrigerator while you make the filling.
For a wintry pie, choose a filling made of in-season or dried fruits, such as this winter apple and dried-fruit pie recipe from Serious Eats. First, slice your apples into quarter-inch slices, place in a bowl and pour boiling water over them. Cover and set aside to let the apples soften. After 10 minutes, drain the water and let cool for 20 minutes before mixing in dried fruit.
Whisk together sugar, cornstarch, cinnamon and nutmeg, then toss with the fruit until all ingredients are evenly dispersed.
Remove the uncut pie crust from the fridge and place in your pie pan. Let at least 1.5 inches hang over the edges of the pan, Bon Appetit suggested. Brush an egg wash around the top of the crust. Pour in your filling, then top with your cut-out crust. Brush this crust with egg wash, and press the edges of both crusts together to seal it. If you wish, top with sanding or demerara sugar.
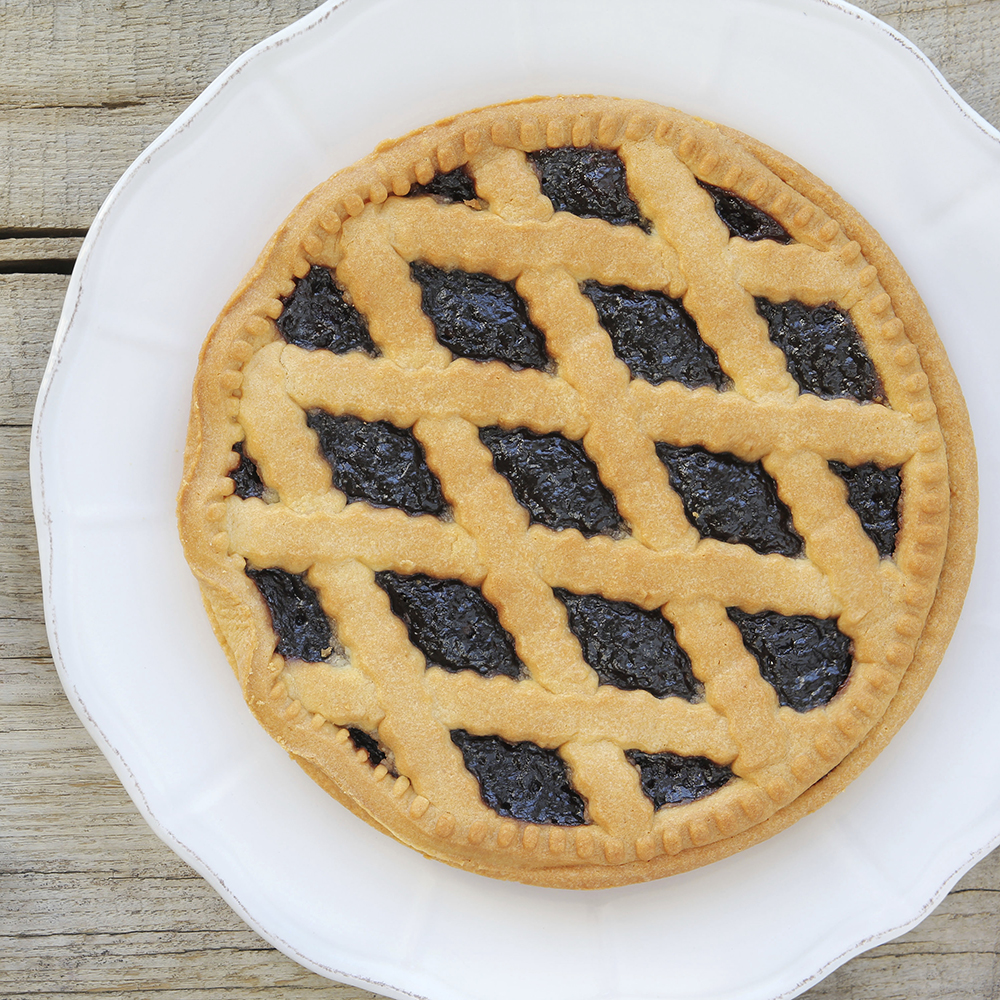
Fun cut-outs adds interest to your pie crust.
Bundt cake with drip icing
Bundt cakes are a classic winter dessert, and their shape allows for unique decorations. Drip icing has become a popular theme in baking, and bundt cakes are particularly excellent for this topping trend as the grooves in the sides guide the icing. Most drip icing styles start with a smoothly frosted cake, according to The Kitchn, but this isn’t necessary.
To make the drip icing, mix chocolate and heavy cream in a microwave-safe bowl, then microwave for a minute. Choose white chocolate for a white drip or add food coloring to achieve your desired hue. Alternatively, use dark chocolate for a richer look. Stir to combine, then set aside to cool for about five minutes. It should be warm to the touch, but not hot.
Make sure your cake is room temperature before applying the icing. Too warm and the icing will melt, causing the drips to run; too cold and it’ll seize the icing, resulting in lumps rather than drips. Spoon the icing over the edge; a piping bag will make the trails look thin and too precise rather than the unpredictable, imperfect drips you’re looking for.
Once the drip icing is cool, feel free to add more decorative elements on top. Evergreen sprigs, cranberries, a powdered sugar dusting or small candy canes all add a wintry touch to your cake.