The warm, inviting aroma of freshly baked sourdough bread may just be the closest we can get to heaven on Earth.
Sourdough bread is a variety of bread made with a starter consisting of flour and water fermented by wild yeast and bacteria. In recent decades, the quest for healthier options has renewed interest in making bread from scratch and sparked a sourdough revival.
And you don’t have to be a professional baker to make top-quality sourdough at home. Fortunately, a little bit of knowledge and patience can make all the difference. You’ll have to supply the patience, but this guide may be able to fill in some of the gaps and give you just enough bravado to roll up your sleeves, fire up your oven, and give yourself a shot at making your very own sourdough bread.
Background of Sourdough and Ancient Bread Making
What makes sourdough bread unique is the starter. A combination of flour, water, and wild yeast, the sourdough starter is used to leaven the bread, and the lactic and acetic acid from the yeast gives the bread its characteristic flavor and chewy texture. Sourdough bread has been made for centuries, and it is still popular today due to its unique flavor and purported nutritional benefits.
While the oldest archeological bread currently on record dates back 14,000 years, that particular example was a flatbread — unleavened by yeast or bacteria. The Ancient Egyptians took massive leaps forward in bread making, as the first to leverage natural yeasts along with naturally occurring bacteria as leavening agents.
It’s the activity of the naturally occurring bacteria that lends the specific taste to sourdough, and nurturing that natural bacteria in a combination of flour and water creates the critical component of any sourdough bread: the starter.
These bread making traditions persevered until the Industrial Revolution arrived, when a push for speed and affordability, overtook the tradition of handmade bread.
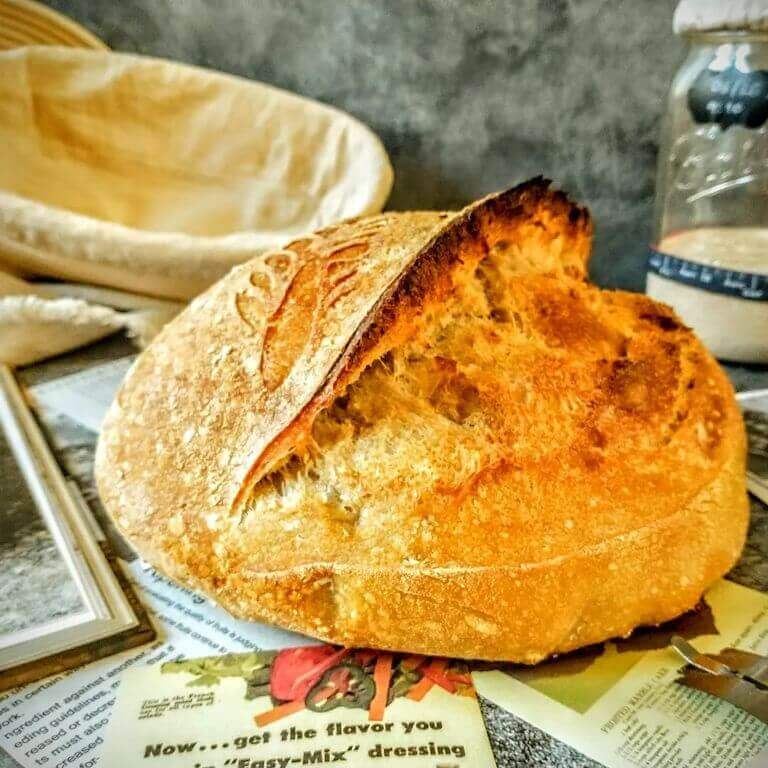
This sourdough loaf was baked by Escoffier Online Baking and Pastry Graduate Lilian J., reflecting centuries of artisan baking techniques.
Common Terms Used in Artisan Bread Baking
- Sourdough Starter: Combination of flour and water that has been fermented to develop a wild yeast culture
- Ancient Grains: Ingredients like buckwheat, spelt instead of modern wheat
- Benching: Resting the dough to allow the gluten to relax
- Crumb: The inside of the loaf
- Elasticity: How the dough retracts to the starting point after being stretched
- Extensibility: The ability of a dough to be stretched and shaped
- Fermentation: When yeast and bacteria convert sugars from flour and other ingredients into alcohol and carbon dioxide, which causes the dough to rise and creates a light and airy crumb
- Hydration: The relative amounts of liquid and flour in the dough, with high levels of hydration, resulting in chewier bread
- Proof: The final rest and rise time for dough before baking
How To Make Sourdough Bread
Making a divine loaf of sourdough bread isn’t something that comes easily, but the rewards are well worth the effort. When the late, great baker Andy Clark appeared on Escoffier’s Ultimate Dish podcast in 2021, he didn’t mince words about the challenge breadmaking presents.
“You’ve got your fermentation of your sourdough, mixing, bulk fermentation, divide and shape the dough, you have to proof it, you have to load it into an oven and bake it correctly,” he said. “There’s probably three distinct areas that it takes a long time to familiarize yourself with, let alone master.”
As tough as it may be to create a mouthwatering bit of bread, we have a few tips that can get you started down the path.
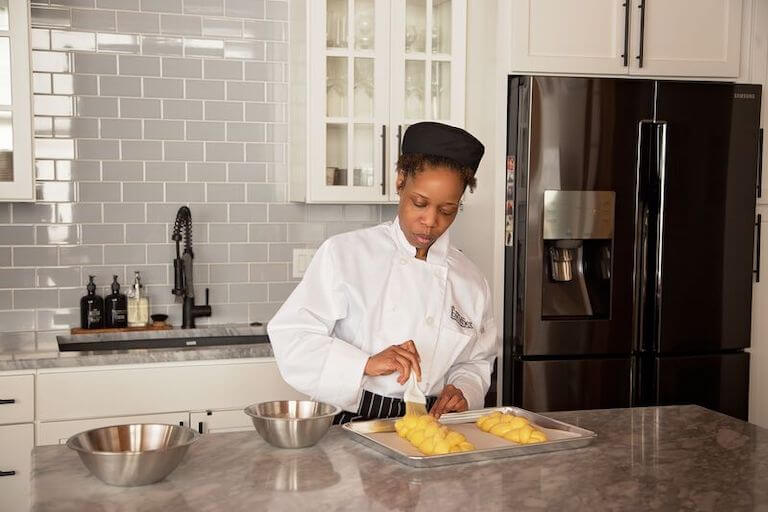
Escoffier online students learn the basics of baking bread and dough products.
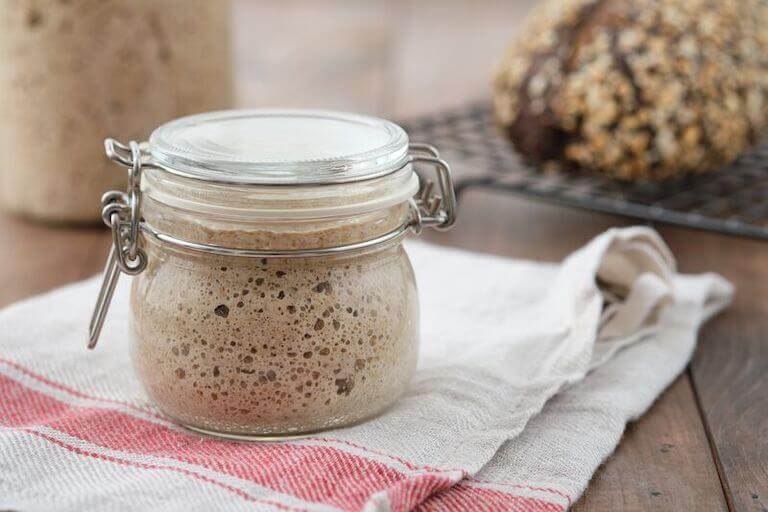
1. Simple Steps to Create a Sourdough Starter
While you can purchase sourdough starter kits, you can make your own with a little time and effort. Here are the steps for a simple sourdough starter:
- Ingredients: 50g whole wheat flour, 50g bread flour, 100g filtered or spring water
- Day 1 – Mix the flours and water in a clear jar and cover with a cloth or loosely with a lid. Store the starter at room temperature.
- Day 2-7 – Remove half the starter from the jar (you can use this “discard” in other recipes, from waffles and muffins to tortilla shells). Feed the starter with equal parts of water and flour (50g each). Mix and cover. You may see bubbles form as fermentation begins. If liquid is on top of your starter, it’s hungry and needs to be fed with a little more water and flour.
- Day 8-10 – Continue feeding and discarding. There should be consistent bubbles, and the starter should double in size every 8-12 hours. If it doesn’t double, continue until it reaches this stage.
- Maintenance – Now that your starter is active, you can store it in the refrigerator and feed it once a week or begin baking with it immediately. If it has been refrigerated, “wake it up” before baking by feeding it daily for several days.
- Use: When your starter is big, bubbly and ready for prime time, you’ll use it to make your dough! You may need to wake it up for a day or so if it’s not at its grandest when you’re planning to bake.
2. Sourcing and Selecting Your Ingredients
Sourdough bread baking is not only about the recipe; it’s about seeking ingredients that you can transform into a symphony of flavor and texture.
Fancy ingredients and equipment aren’t needed to make your own starter and freshly baked sourdough bread.
Control Flavor with Your Choice of Flour
When choosing flour, embrace those with high protein content, such as bread flour. The robust gluten content forms structured loaves and an airy crumb.

To kick your bread up a notch, experiment with ancient grains like einkorn or spelt for a nutty depth. You can also source locally milled flour or mill your own to retain more nutrients and unique flavors. Keep in mind that these alternative flours may require gentler handling, so you might want to start with traditional bread flour and expand after you’ve had some success.
The Right Water Leads to Consistent Results
Water temperature is a critical factor to consider, as well. You can slow or kill the yeast and bacteria by using too-hot or too-cold water. Filtered or spring water is the best way to aid fermentation and avoid impurities. Using the same type of water each time will help provide consistent results in your loaves.
Water Can Make or Break Your Bread
If you have any doubts that water can make a difference, just look to Brooklyn Water Bagels, a company that’s replicating the mineral composition of NYC tap water to make authentic Brooklyn-style bagels in Florida!

The flour you choose plays into the flavor and texture of your finished loaf.
3. Putting It All Together — Time To Make Your Dough
Now that you’ve got your sourdough starter and your ingredients laid out, it’s time to mix them all together to make the dough for your bread.
Here’s a quick idea of what should be in front of you, though you may need to make adjustments based on selected flour and water characteristics:
- 425g unbleached bread flour
- 75g wholemeal wheat flour
- 350g water
- 125g young, ripe sourdough starter
- 10g salt
Building Structure and Tension Through Shaping
Respecting the dough’s rhythm: You want to avoid overhandling the dough. Instead, gently shape the dough with lightly floured hands or benches. Allowing the dough to rest will relax the gluten and make it easier to shape.
Mastering different shapes: Traditional sourdough is often round, and techniques like rounding, stretching, and folding can build tension and help control crumb density. Experiment with different shapes, depending on your desires. Remember, practice makes perfect.
Creating tension for the rise: Think of shaping as building anticipation for oven spring. A well-shaped dough holds its form and expands beautifully in the heat.
4. How to Score Bread Like a Professional
Scoring isn’t merely for decoration; it allows the dough to expand gracefully during baking, releasing gasses in a controlled manner. Think of it as guiding the rise for even browning and preventing unwanted tears. Aim for shallow scores that reach about 1/4 inch into the dough. Deeper cuts can affect the structure and potentially lead to burning.
A sharp lame (bread lame) or razor blade offers precise control when scoring. Sourdough bread often has four perpendicular slashes in it, not unlike the # symbol. Experiment with patterns such as simple slashes, geometric designs, or even artistic flourishes to personalize your loaves. This is a chance to let your creative side flow.
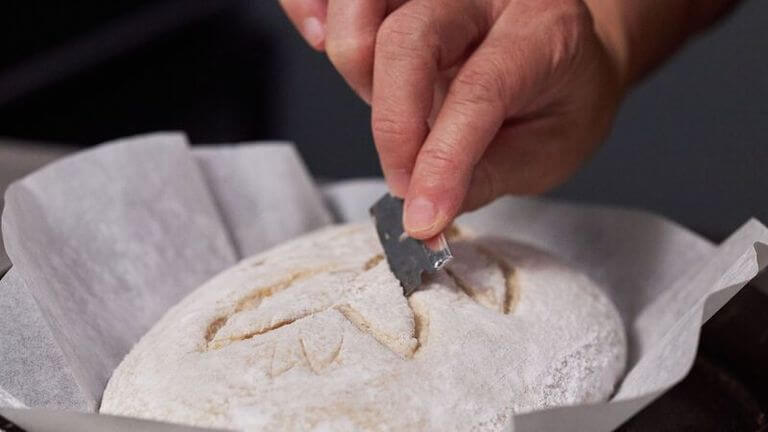
Scoring the bread plays an important role in the baking process and adds a decorative touch.
Tips for Shaping and Scoring Success:
Remember that artisan bread baking is a skill that can take time to develop. If your first attempts don’t work out like you hoped, stick with it. Here are some tips that can help you:
- Use a floured tea towel or basket: Proofing baskets add a rustic touch but, more importantly, help your bread maintain its shape.
- Less is often more: Start simple and try more advanced shaping techniques and scoring patterns as your skills improve.
- Embrace imperfection: The charm of artisan bread is in its handmade character.
Shaping and scoring are opportunities to express your creativity and connect with your dough. Slow down, enjoy the process, experiment, and watch your loaves become works of art.
5. Entering the Oven: Sourdough Bread’s Final Phase
Baking is where all your efforts culminate in a symphony of aroma, crust, and crumb. Here’s your guide to achieving the perfect bake:
- Preheat Your Oven: Preheat your oven for at least 30 minutes at the desired baking temperature (usually between 425°F and 475°F). This crucial initial burst of heat results in a beautiful rise and crust formation.
- Consider baking methods: Dutch ovens offer a steamy environment, creating a crackly crust. Stone baking delivers even heat for consistent browning. Choose the method that best suits your recipe and desired outcome.
- Introduce steam in the early stages of baking: Add a pan filled with boiling water in the preheated oven to help create a moist environment to control crust development. Steam delays crust formation, which helps promote greater loaf volume. Remove the pan after the first 10-15 minutes.
- Bake until golden: Don’t rely solely on your kitchen timer when baking. Watch for a golden crust to appear. In addition, most sourdough bread should reach an internal temperature of around 190°F to 205°F.
When the smell of freshly baked bread hits your nose, it’s tempting to cut right into it, but resist the urge. Allowing the bread to cool before slicing helps the crumb to set.
Continue to Develop Your Bread Baking Skills
Maybe your first loaf doesn’t turn out great, but the next one might. Sourdough bread making is a hobby that becomes more rewarding as you grow — rewarding for both the spirit and the stomach. But it doesn’t have to remain just a hobby, especially if you find it brings you a great deal of joy. A culinary education can offer you the time, tools, and techniques to improve your bread by leaps and bounds, with experienced Chef Instructors able to guide you along the way.
So, if your passion for baking extends beyond your home kitchen, consider exploring Escoffier’s Baking & Pastry programs. Whether you dream of owning your own bakery or starting your journey toward becoming a pastry chef, our programs can help you develop your skills.