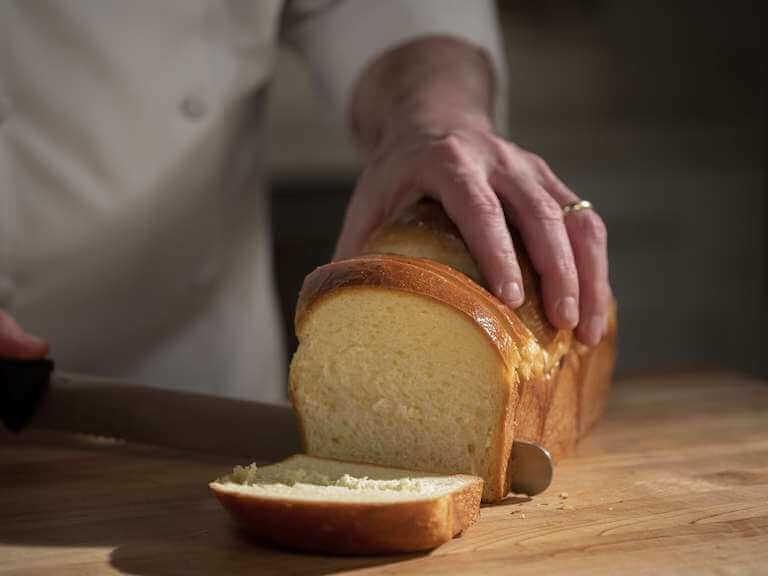
Let’s talk about baking bread from scratch—it may seem like an all-day affair. You might even think you need to be some sort of rocket scientist to do it. But in reality, it comes down to four simple ingredients: flour, yeast, water, and salt.
Of course, if you’re planning to make sweet banana bread with walnuts or crunchy sourdough, the process and ingredients might vary slightly. Before you pull out your bread-baking apron, here are our best tips on how to make bread from scratch.
Understanding Different Types of Bread
With so many homemade bread recipes circulating around the internet, you might think there are a million and one types to choose from. But it really comes down to two main categories of bread, each requiring a different degree of complexity.
Quick Bread (No Yeast)
The “everyday” home-kitchen chefs rarely ruin quick bread because it doesn’t require the technical skillset needed for “yeast bread.” In fact, quick bread doesn’t require any yeast since baking soda or baking powder is usually added, acting as the leavening agent. You simply mix ingredients according to instructions, pop the mixture into a baking dish, bake in your oven, and voila! No proofing is required. Some of the most popular quick breads include cornbread, soda bread, zucchini, and banana bread.
Yeast Bread
It’s no secret that signing up to make “yeast bread” from scratch is slightly more time-consuming and requires a bit more attention to detail. Bread types like pizza dough, flatbreads, batter rolls, English muffins, focaccia, and more all require the addition of yeast.
Depending on the recipe, yeast bread might require kneading the dough before shaping and baking. This is likely a critical step to activate the gluten by harnessing the carbon dioxide (or gas) created by the yeast, which causes it to rise!
Types of Yeast
- Active Dry: Granular and dry in texture, this type of yeast needs to be mixed into lukewarm water at around 110 degrees Fahrenheit to become active. Once this process is complete, the yeast is then mixed into the dry ingredients.
- Fresh Yeast: Also known as “cake” or “compressed” active yeast, this type is usually sold in stores in a block or compressed form and should be refrigerated due to its shorter shelf life. This yeast variant is ideal for breads that require longer rising and proofing times.
- Instant: This is viewed as the “no-fuss” yeast option in the baking world, as you don’t need to proof it before using it. Why? Because specific enzymes are added to instant yeast that triggers the dough to rise faster. In fact, you can dump instant yeast right into your dry ingredient mixture.
How to Make Bread from Scratch
As we mentioned, the process for quick bread is relatively straightforward. If you follow recipe instructions, you should be munching on homemade bread in no time. On the flip side, the process for yeast bread is more intricate and of course, varies slightly, depending on the recipe.
Students in Escoffier’s in-person and online baking school can explore all of the nuances in the bread baking process, including how to bake different types of yeasted bread. For example, in the artisan bread baking course, students can discover more intricate details such as the development of gluten, how to use starters, and hydration levels during baking, as well as the main differences between warm and cold proofing.
“I’ve been a cake designer for years but having been exposed to such a variety of desserts and breads in the program, I found my passion for flavored Pretzels. Very unexpected, and pleasantly surprised! Turns out, I love working with dough!”*
Maria Bari, Online Bakery & Pastry Graduate
However, if you’re a beginner at bread-making, there’s a basic framework for yeast bread that might help prepare you for what to expect.
1. Prepare Mise en Place
This french term means “everything in its place,” which ultimately translates to completing vital kitchen preparation. In the case of bread-baking, you’ll want to read your recipe thoroughly, then collect and measure all of the necessary ingredients with the utmost accuracy. Set them out so that they’re easily accessible during the baking process.
2. Proof the Yeast
Depending on the type of yeast used (active or instant) you’ll want to proof your yeast at the beginning of the bread-making process. If you’re choosing to hydrate “active dry” yeast, you’ll usually wait about 5-10 minutes before it starts to foam (which is a sign you’re on the right track).
3. Combine and Mix
When it comes to mixing, there are a few different methods you can use, but according to Baker Bettie, one of the most popular today is called the “straight dough method.” This might be the best approach when baking lean bread that doesn’t contain any fat, like French and Italian bread, or pizza crust. This entails mixing all of the ingredients in one step, versus multiple steps—which makes this method a bit more streamlined.
The “sponge method” is a bit more complex. Around half of the ingredients are mixed together to form a sponge. Once it doubles in size, the remaining ingredients are mixed in, creating a lighter texture. This method is often leveraged for whole grain bread.
4. Knead the Bread Dough
Kneading the dough is an essential step of the process and varies slightly depending on the type of bread. In general, lean dough requires more time, versus enriched or high-fat dough, such as tortillas, flatbreads, or certain types of rolls.
3 Ways to Knead Bread Dough
- Stand mixer: Ideal way to churn large amounts of ingredients at a steady pace
- Kneading by hand: May lead to better gluten formation and texture in baked goods
- Bread machine: Less hassle than all other methods and usually works for most bread types
5. Rest and Rise
Once all of the ingredients are mixed, then it’s time to allow the yeast to work its magic and allow the bread to rest. As the fermentation process ensues, the bread will slowly begin to rise, forming the texture and flavors simultaneously.

6. Shape the Dough
After the first rise is usually the ideal time to shape the bread. Again, depending on the recipe and level of complexity, bread shapes vary entirely.
For example, for French bread, the dough is cut straight down the middle, leaving you with two identical shapes. Italian-style bread is shaped into ovals. In certain instances, you might braid the dough, such as when baking a traditional challah bread.

Challah Bread shaped and doused in egg wash.
7. Complete the Second Rise
This is the second to last step in the “bread from scratch process,” also known as proofing—the exact time when the bread takes on most of its robust volume. It’s very common for shaped bread to double in size.
In some cases, the recipe might require you to “punch” the dough after the first rise, which activates the release of gases, relaxes the gluten, and redistributes the yeast cells available to the sugar in the dough. After this step, the dough proofs again, and then the “shaping” takes place.
8. Bake
Once the proofing is complete, you’ll want to bake immediately to avoid over-proofing. As far as heating your oven, the temperature might vary slightly depending on the bread type.
According to King Arthur Baking Company, the “baking” step can make or break your bread and it’s important to follow instructions.
- Sweet rolls, dinner rolls, and soft bread: Bake at a low temperature (350 degrees or lower) for a longer period of time
- Crusty bread: Add steam to your oven first and bake for a short period of time at higher heat (425 degrees or higher)
As far as internal temperature, according to Therm Pro, heavier dough bread is done around 180-200 degrees Fahrenheit and lean dough should register between 190-210 degrees Fahrenheit.
Discover How To Professionally Bake Bread From Scratch
For the most part, if you have an easy-to-follow bread recipe and the right ingredients, you can whip up all types of bread in your kitchen and potentially “wow” your family and friends.
However, if you’re looking to elevate your bread-baking skillset, work in a bakery, or potentially start your own business, then Escoffier’s Baking & Pastry program might be just the right place to start.
If you’re interested in discovering more about the bread-baking curriculum, contact us today to learn more about our programs!
Enjoyed reading this article? Check out these ones next!
- 6 Advanced Baking Techniques Every Pastry Chef Should Know
- What are the Baking and Pastry Arts…and is it a Career for You?
- How to Start Your Own Bakery
*Information may not reflect every student’s experience. Results and outcomes may be based on several factors, such as geographical region or previous experience.