Listen to This Article:
Whether you are a high school culinary instructor leading your first lab or a chef training a new hire, one truth remains: knife skills are the first practical skill. In a classroom setting, these early lessons are about more than just a uniform dice; they are about building a culture of mutual respect and physical safety that can define the rest of the semester.
Before the flare of the sauté pan or the artistry of the plate, there is the quiet discipline of the cutting board. To ensure your students start their journey with the right habits and a safe mindset, here is a practical guide for walking them through those first essential steps.
Why Knife Safety Is the First Professional Benchmark
In a professional kitchen, speed and precision are the baseline. Line cooks work fast, mise en place has to be consistent, and there is rarely any room for preventable mistakes. A knife injury is not only dangerous for the individual cook, but it can also stop service, pull attention away from the line, and put the entire kitchen behind.
For students thinking about culinary careers, the way they pick up a knife, position their cutting board, and move through a task tells an experienced chef a great deal about their focus and discipline.
Chefs often think of these as early reads on whether someone has the mindset to work in a professional kitchen. It’s the same reason culinary programs like Auguste Escoffier School of Culinary Arts mirror these industry standards from day one, treating knife safety as the first signal that a student is ready to learn and work like a professional.

Core Knife Safety Principles Every Student Should Develop
In professional kitchens, standards apply to every cook, regardless of title or experience. When you teach knife safety, you are introducing students to those expectations.
The habits you establish early are the same fundamentals reinforced and assessed in formal culinary training.
Proper Grip and Hand Position
Proper grip is where professional knife work begins, and it is often one of the first habits students need help developing. Instructors should return to it often, especially in early labs, as students build comfort and confidence at the cutting board.
The pinch grip forms the foundation of control. Students should place their thumb and the side of their index finger directly on the blade, just in front of the handle, while the remaining fingers wrap securely around the handle.
Many students initially default to gripping the handle alone, which is a natural instinct. This grip, however, limits stability and encourages excess wrist movement.
The pinch grip shifts control into the hand and forearm, making cutting more steady and reducing fatigue during longer prep sessions. Remind students that although this shift may feel awkward or uncomfortable at first, it’ll prove to be a game-changer for their long-term precision and safety.
The guiding hand plays an equally important role. Teach students to form a claw by gently curling their fingertips under and positioning their knuckles toward the blade. As they cut, the flat side of the knife should lightly brush the knuckles. This creates a natural barrier between blade and fingertips while also providing a reliable guide for consistent, even slices.
It is normal for students to revert to old habits when they feel rushed or start to work faster. Patient, consistent reinforcement during early labs can help these grips become second nature, setting expectations that align with professional culinary training.

Students can build professional habits by practicing a proper pinch grip and steady guiding hand.
Stable and Organized Workstations
Help students develop the habit of setting up their station before they ever pick up a knife. Placing a damp towel or nonslip mat under the cutting board can keep it steady and allow students to focus fully on their cuts.
A clear work surface matters just as much. Extra tools and stray ingredients can create distractions that may increase risk.
When a knife is not in use, guide students to place it flat on the board with the blade facing away, or return it to proper storage. Knives should never rest at the edge of the counter or be hidden under prep. When these expectations are reinforced consistently, students can begin to treat organization as part of professional kitchen culture rather than a separate rule.
Controlled Movement Over Speed
Remind students that speed is not something they need to chase early on. It develops naturally through repetition, confidence, and sound technique.
Encourage them to focus first on controlled movement. A steady rocking motion, the tip of the knife staying in contact with the board, eyes on the blade, and cuts kept consistent in size can all help build control. As students become more comfortable with these fundamentals, their pace can begin to increase on its own.
Frame speed as a result of doing things well, not as a goal to reach quickly. When students prioritize accuracy and control, efficiency can follow in a way that can be safer and more sustainable over time.
Safe Transport and Storage
Help students understand that knife safety does not stop at the cutting board. How a knife is carried, cleaned, and stored is just as important as how it is used.
When moving through the kitchen with a knife, students should hold it pointed down with the blade facing back and clearly announce “behind” or “sharp” to those nearby. This simple habit can build awareness and reinforce the communication expected in professional kitchens.
Knives should never be placed in a sink, where they cannot be seen. After use, guide students to hand wash the knife, dry it immediately, and return it to proper storage, whether that is a knife roll, block, or magnetic strip. These routines may feel small, but they form the everyday practices that can keep professional kitchens safe and running smoothly.
Classic Knife Cuts
How to Use This Chart in Class
- Introduce one or two cuts at a time rather than all at once.
- Post the chart in the lab so students can reference terminology.
- Require students to label their cuts verbally during practice.
- Assess both size consistency and safe technique together.
| Cut Name | Approximate Size | Shape Description | Common Uses | What Instructors Should Emphasize |
| Large Dice | ¾ inch × ¾ inch × ¾ inch | Even cubes | Hearty soups, stews, roasted vegetables | Straight edges before cubing, consistent measurements |
| Medium Dice | ½ inch × ½ inch × ½ inch | Even cubes | Sautés, composed salads | Control and uniform cooking size |
| Small Dice | ¼ inch × ¼ inch × ¼ inch | Fine cubes | Sauces, fillings | Precision and knife tip control |
| Brunoise | 1/8 inch × 1/8 inch × 1/8 inch | Very fine cubes | Fine sauces, garnishes | Patience and careful knife control |
| Batonnet | ¼ inch × ¼ inch × 2 inches | Thick sticks | Roasted vegetables, fries | Squaring off the vegetable first |
| Julienne | 1/8 inch × 1/8 inch × 2 inches | Thin matchsticks | Stir-fries, garnishes | Consistent thickness and even pressure |
| Chiffonade | Thin ribbons | Leafy strips | Herbs, leafy greens | Rolling leaves tightly before slicing |
| Paysanne | ½ inch wide, 1/8 inch thick | Thin flat shapes | Rustic soups and vegetable medleys | Even thickness for uniform cooking |
A Detailed Plan for Teaching Kitchen Knife Safety in High School
Knife instruction can work best when it follows a deliberate sequence. Here we’ll show you how you can help build student confidence at each stage before moving to the next.
Step 1: Demonstrate Slowly and Narrate Everything
Before a student picks up a knife, they should watch someone who knows exactly what they are doing, and hear every decision explained out loud.
Start with your own station setup, mentioning the core principles outlined above. Show students how you position your cutting board, place the damp towel underneath, and organize your workspace before anything else happens.
Then pick up the knife and narrate your grip. Name it. Explain why the pinch grip gives you more control than holding the handle. Show them what the wrong grip looks like and why it creates problems.
Move through a basic cut slowly, calling out each element as it happens, such as the claw, the rocking motion, where your eyes are, how the knife stays in contact with the board. Then do it again at a realistic pace so students can see what the technique looks like when it becomes natural.
Common mistakes are worth demonstrating too. Show what could happen when the guiding hand is flat instead of clawed. Show what a rushed, straight-down chop looks like compared to a controlled rocking motion. Students remember what they see, and seeing the mistake named and corrected can be more effective than only viewing the right way.
Step 2. Introduce Classic Cuts and Professional Terminology
After demonstrating foundational safety, introduce students to the classic cuts used in professional kitchens. Even at the high school level, naming these cuts can establish alignment with industry standards.
Start with:
- Large dice
- Batonnet
- Julienne
Define each cut clearly and, when appropriate, include approximate measurements. For example, a batonnet is typically cut into uniform sticks about ¼ inch by ¼ inch by 2 inches. A julienne is thinner, often about 1/8 inch by 1/8 inch.
Explain that uniformity is not simply aesthetic. It affects cooking time, texture, and presentation. Using correct terminology can reinforce that students are learning the language of professional kitchens.
When students understand the target, their practice can become intentional rather than repetitive.
Practicing uniform cuts—small dice, julienne, batonnet, and medium dice—can help students build professional standards from the start.
Step 3. Start With Low-Risk Ingredients
Once students understand the principles, it’s time for them to get their hands moving and practicing. Cucumbers, zucchini, and potatoes are ideal starting points. They are soft, stable on a cutting board, and forgiving when technique isn’t perfect yet. They also tend to be inexpensive, which makes them practical for repeated classroom practice without straining a program’s budget.
Starting here can let students focus entirely on grip, hand position, and movement before the tasks get more complex.
Step 4. Supervised Repetition
Knife skills are built through muscle memory, and muscle memory takes time. Short, focused practice sessions can often be more effective than long ones. Students can retain more when they are not fatigued, and instructors can give more meaningful attention to each station.
During practice, instructors should move through the room actively, looking at hand placement and posture rather than just the cuts being made. A student can produce a decent julienne with a grip that will cause problems later. This is the time to address missteps, before unsafe habits become automatic.
“You’re going to make mistakes,” Chef Instructor Miguel Olmedo, who teaches foundational courses at Escoffier, tells students. “We expect you to. If you don’t make a mistake, you’re not going to learn. Make those mistakes now, so when you’re out in the industry, you don’t make them later.”
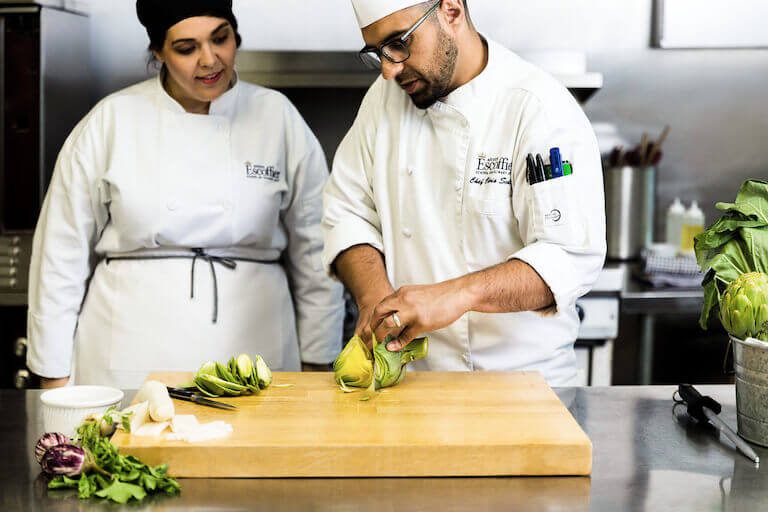
Instructor-guided practice can allow students to refine technique in real time—correcting grip, angle, and control before habits are set.
Practice Drills and Skill Checks That Can Build Professional Habits
The following classroom drills can reinforce knife safety while giving you measurable benchmarks to assess progress.
Mise en Place Readiness Check
Before any cutting begins, students run through a simple checklist: board secured with a damp towel, knife inspected, hands dry, station organized and clear. This takes less than a minute and can reinforce that preparation is part of safety, not separate from it.
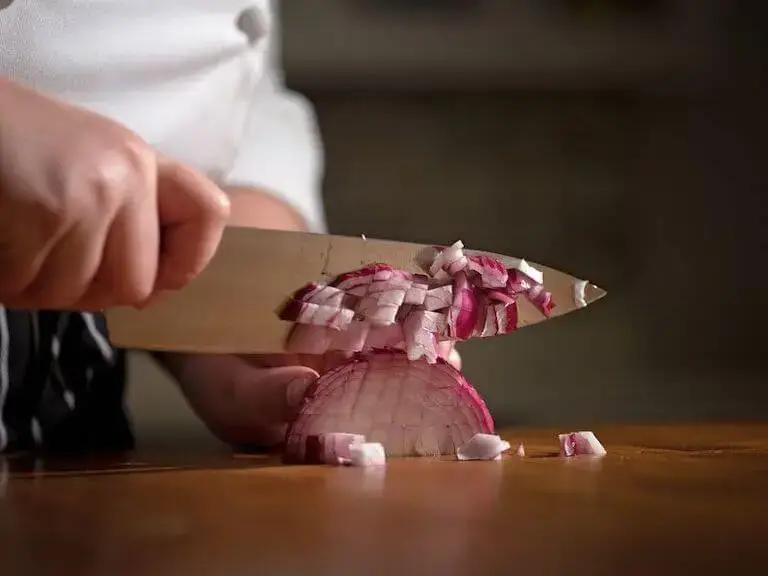
Onion Dice Drill
The onion dice is a classic early exercise because it requires students to manage an awkward shape while applying everything they have learned. The focus is on stabilizing the onion with a flat cut before starting, keeping the root intact to hold the layers together, and producing uniform cube sizes throughout. Inconsistent dice usually signals a grip or claw issue worth addressing.
Carrot Batonnet Precision Exercise
Before making a single cut, students square off the carrot on all four sides. This step teaches them to think about structure before technique, a habit that carries into more advanced prep work. The goal is uniform sticks that match batonnet measurements, but the bigger lesson is learning to set a vegetable up for success before cutting begins.
A Simple Assessment Rubric
Instructors benefit from measurable criteria, and students usually perform better when they know what is being evaluated. A basic rubric for knife safety might assess grip consistency, board stability, uniformity of cuts, workspace cleanliness, and knife handling between tasks.
Professional culinary programs evaluate students on these same standards during early lab courses. Using similar criteria at the high school level can give students a preview of what serious culinary training looks like and signals that what they are learning now carries real weight.

For Students Ready to Go Further
Knife safety is where culinary education begins, but it is far from where it ends. Students who develop these habits early can build a foundation that every serious kitchen will expect them to have. For students who find themselves energized by this kind of training, culinary school might just be the next step.
Through Escoffier’s culinary arts programs, students can discover fundamental knife skills, mise en place, cutting techniques, and much more in a professional environment built to mirror industry standards. If a student you know is ready to take these skills further, contact us today to learn more about our programs.
IF YOU LIKED THIS ARTICLE, TRY THESE NEXT:
- How to Care for Your Kitchen Knives: Sharpening & Storage
- 25 Cooking Techniques Every Cook Should Know
- 6 Skills You Can Learn in Culinary School That You Can’t Get on the Job
FAQs
While foundational safety can be introduced at a much younger age, formal knife skills typically become a core focus in high school culinary programs. With structured supervision, students at this level are ready to move beyond the basics to professional grips and precision cuts. Starting with proper grip, stable workstations, and low-resistance ingredients can help build confidence while reinforcing safety.
Many high school culinary programs begin with large dice, batonnet, and julienne. These cuts introduce students to uniform sizing, straight edges, and professional terminology. As control improves, smaller dice and brunoise can be introduced to build precision.
Students who develop disciplined knife habits early may adapt more quickly to formal culinary training. Professional programs build on these fundamentals with fabrication, segmenting, higher production volume, and increased speed, but safe, controlled technique remains the foundation.
It’s common for beginners to feel intimidated by professional blades. The best approach can be to focus on stability and control. Start students with “soft” ingredients like potatoes or zucchini that don’t require much force, and ensure they are using a “claw” grip to keep fingertips tucked away. Remind them that a sharp knife is actually safer than a dull one, as it requires less pressure and is less likely to slip.
Supervision is the most critical element of high school knife safety. Many instructors use a “Red Zone” policy, where knives are only allowed at designated, cleared workstations. Additionally, implementing a strict “calling out” system—where students say “Knife behind!” or “Sharp corner!” when moving—can create a professional environment that prioritizes situational awareness.
The two most frequent errors are usually “the floating finger” (placing the index finger on the spine of the blade) and a cluttered workspace. Using the index finger on the spine reduces lateral stability and control. Keeping the cutting board clear of scraps and ensuring it is anchored with a damp paper towel or non-slip mat are the first habits students should develop to prevent accidents.