Listen to This Article:
Gluten-free baking can look promising right out of the oven, but the texture can sometimes tell a different story. What should be a soft and cohesive muffin or a tender and delicate cake can quickly turn dry, gritty, or crumbly.
That texture element that can leave your gluten-free baked goods wanting comes down to structure. But once you understand how the various elements work together, you can start to control texture instead of guessing, opening the door to gluten-free baking that feels just as satisfying as it tastes.
Why Gluten-Free Texture Requires a Different Approach
One of the most common assumptions in gluten-free baking is that you can swap a wheat flour for a gluten-free alternative one-to-one and expect similar results. It seems straightforward, but it rarely works that way.
In traditional baking, gluten forms when water is mixed with wheat flour and the dough is stirred or kneaded. The proteins in the flour begin to link together and stretch, creating a flexible, web-like network. Some of these proteins give the dough elasticity, helping it spring back, while others allow it to stretch without tearing.
This network acts like a net, trapping air and steam as the dough bakes. As those gases expand, the dough rises and holds its shape instead of collapsing. Once baked, that structure sets, giving bread its airy crumb and cakes their soft, cohesive texture. You can see this difference clearly when comparing a chewy bread like focaccia or pizza dough, which relies on strong gluten development, to a tender cake, where minimal gluten development keeps the texture soft and delicate.
When you remove gluten, that structure disappears. Gluten-free flours don’t naturally bind or stretch in the same way, which is why baked goods can turn out dry, crumbly, gritty, or uneven.
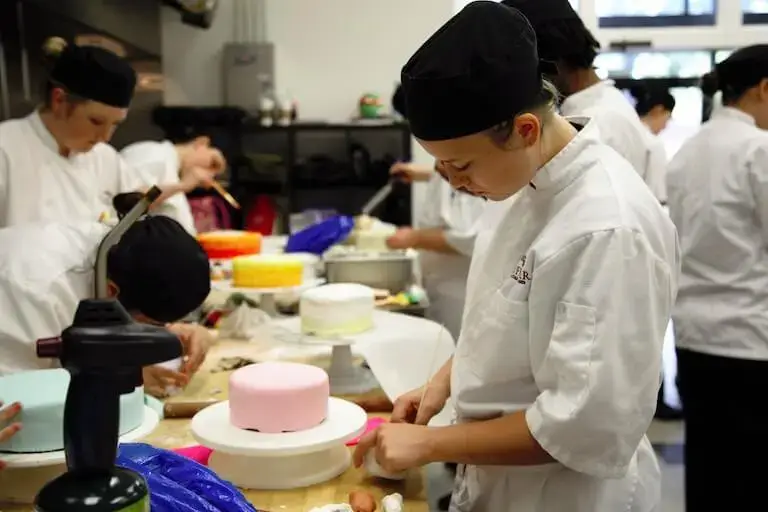
In Escoffier’s Baking and Pastry Arts program, students can explore how ingredients function and how to adjust recipes with confidence, an essential skill in gluten-free baking.
To achieve a really great gluten-free bake, structure has to be built through a combination of elements, not just swapping flours. Instead, you’re re-creating the structure that gluten would normally provide. That means adding starches to create tenderness, binders to provide cohesion, and enough hydration to form a cohesive batter or dough. Texture in gluten-free baking comes from how these elements work together, not typically from a single substitution.
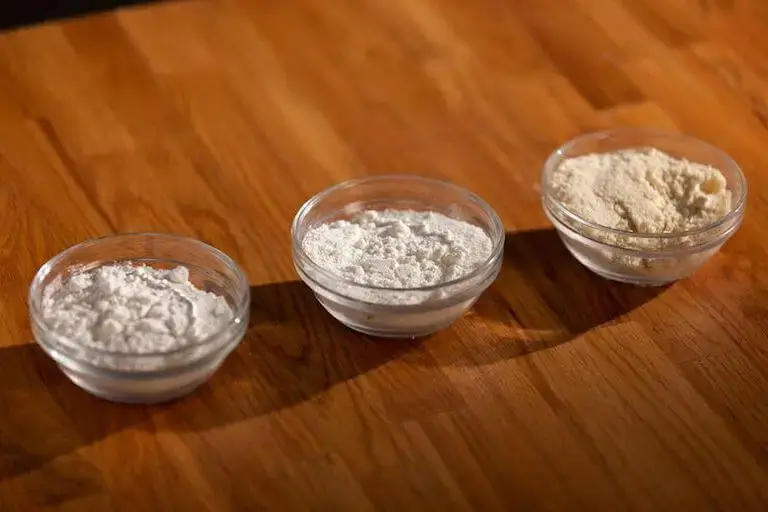
Core Components of Gluten-Free Baking
| Component | What It Does | Common Examples |
| Base Flours | Provide body and foundational structure | Rice flour, sorghum flour, oat flour |
| Starches | Add lightness and tenderness | Tapioca starch, potato starch, cornstarch |
| Binders | Hold everything together and add elasticity | Xanthan gum, guar gum, psyllium husk |
| Liquids/Hydration | Help flours absorb and form a cohesive batter or dough | Water, milk, eggs* |
| Fats/Moisture Builders | Improve softness and prevent dryness | Butter, oil, yogurt, applesauce |
*Eggs also contribute some binding and structure, but in gluten-free baking they typically aren’t strong enough on their own. Additional binders help provide the elasticity and stability that gluten would normally offer.
5 Gluten-Free Baking Tips to Prevent Grittiness
If your gluten-free baking has ever turned out gritty, the problem is rarely just one thing. It usually comes down to five key elements: the flours you choose, how you blend them, how much liquid you use, whether you give the batter time to rest, and which binders you use. When these pieces are working together, texture improves quickly.
If you’re new to gluten-free baking, start with a tried-and-true recipe and follow it closely. With so many variables at play, changing ingredients too early can make it harder to understand what’s actually affecting your results. Once you’re familiar with how these elements work together, you can begin to adjust with more confidence.
1. Making the Right Flour Choice
You may come across products labeled as “1-to-1” or “cup-for-cup” flour substitutes. These are typically pre-made blends of gluten-free flours, starches, and sometimes binders designed to mimic wheat flour. They can be a really helpful starting point, especially when you’re first learning.
That said, they don’t always behave exactly like wheat flour in every recipe. Results can vary depending on the blend and the type of bake, which is why understanding how individual gluten-free flours work can make a big difference.
As you dig deeper into gluten-free baking, you’ll start to notice the wide range of gluten-free flours available in the baking aisle or specialty shops. This can feel overwhelming at first, especially since each one behaves a little differently and can impact texture in its own way. But learning how these flours function is what can allow you to start shaping your results, whether you’re aiming for a tender crumb or something with a bit more structure and spring.
Understanding how individual gluten-free flours work can make a big difference in your baking.
Here’s what that can look like in practice:
- Rice flour is one of the most common gluten-free flours. It provides structure, but on its own, it can create a gritty or sandy texture, especially if it isn’t finely milled or fully hydrated.
- Almond flour adds moisture and richness, which can make baked goods feel soft at first. But it doesn’t provide much structure, so cakes may sink or fall apart when sliced.
- Oat flour holds moisture well and can create a tender crumb, but it can also make baked goods feel dense if it’s not balanced with lighter ingredients.
- Coconut flour is extremely absorbent. If used on its own or in large amounts, it can quickly dry out a batter and lead to a crumbly or dry result.
- Sorghum flour is a whole grain flour made from ground sorghum, a naturally gluten-free grain. It has a mild, slightly sweet flavor and works well as a base flour because it adds structure without being too heavy. On its own, it won’t hold a bake together, but when combined with starches and other flours, it helps create a more balanced, tender crumb.
- Buckwheat flour is another gluten-free option that adds structure and a slightly nutty, earthy flavor. Despite its name, buckwheat is not related to wheat and is naturally gluten-free. Used on its own, it can feel heavy or dense, but in a blend it helps strengthen the overall structure of your bake.
You may also see tapioca starch labeled as “tapioca flour,” but in baking it functions as a starch, not a structural flour. Used on its own or in large amounts, it can lead to a gummy or overly soft texture without enough structure to support the bake.
Each of these ingredients brings something useful, but also comes with limitations. When used alone, they tend to exaggerate their weaknesses. That’s why gluten-free baking relies on combining different types of flours and starches, rather than depending on a single ingredient to do everything.
2. Creating the Right Blend: The Three-Part Baking System
Instead of relying on a single flour, gluten-free baking works best when you combine a few different elements, each with a specific role. A simple way to approach this is to think in three parts.
- Base flours provide the foundation of your bake. They give structure, body, and flavor. Common examples include rice flour, oat flour, and sorghum flour.
- Starches help lighten the texture and create a softer crumb. They reduce density and improve tenderness. Examples include potato starch, cornstarch, and tapioca starch.
- Supporting flours help adjust moisture, richness, or structure depending on what you need. Almond flour can add moisture and softness, while buckwheat flour can bring more structure and depth of flavor. Knowing what each of these flours offer can help elevate your baking, improving both texture and taste of our baked goods.
A simple starting point is to build your blend with mostly base flour, a smaller portion of starch, and a small amount of supporting flour. For example, you might use about 60–70% base flour, 20–30% starch, and around 10% supporting flour.
If you’re working in cups, that could look like 1 cup of base flour, 1/3 to 1/2 cup of starch, and about 2 to 3 tablespoons of a supporting flour.
As you bake, take notes on your results. Over time, you’ll start to see how small changes in your flour blend affect texture, making it easier to adjust with intention. The science behind gluten-free baking can actually be really fun and one of the most rewarding parts, once you begin to understand how each ingredient contributes to the final result.
So if you’re making muffins, you might combine oat flour for structure, tapioca starch for lightness, and a small amount of almond flour for moisture. This creates a batter that’s more balanced and less likely to turn out dense, gritty, or dry.
3. Hydration Is the Foundation of Texture
One of the biggest differences in gluten-free baking is how much liquid your ingredients need. Gluten-free flours and starches often require more liquid, and they absorb that liquid more slowly and less evenly than wheat flour.
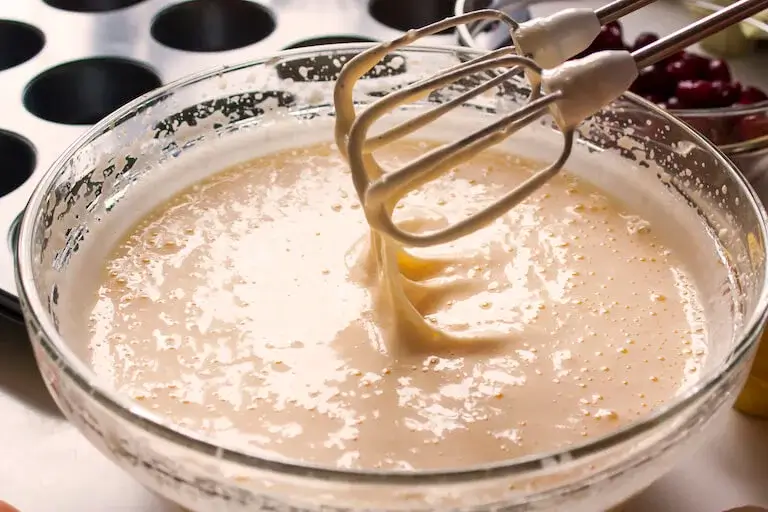
Gluten-free batters are often looser than expected. Higher hydration helps flours fully absorb liquid, reducing dryness and preventing a gritty texture.
When there isn’t enough liquid, the result is often a dry or gritty texture. The flours haven’t fully absorbed moisture, so they remain slightly coarse even after baking.
Properly hydrated gluten-free batters and doughs will often look and feel different than expected. Batters tend to be looser, and doughs are usually softer and stickier than traditional wheat-based versions.
A common mistake is trying to “fix” this by adding more flour to make the dough feel more familiar. This can make the problem worse, leading to a denser, drier result.
4. Resting For Better Texture
Once your batter or dough is properly hydrated, time becomes the next important factor. Gluten-free flours and starches don’t absorb liquid immediately. They continue to hydrate as they sit, which helps soften texture and reduce grittiness.
During this resting period, starches absorb moisture and flours begin to soften. This process creates a smoother, more cohesive batter or dough before it even goes into the oven.
Resting gluten-free dough gives flours and starches time to hydrate.
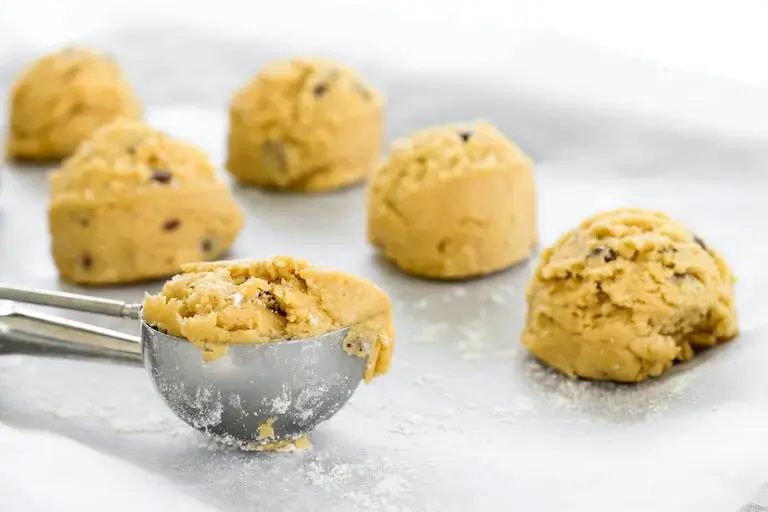
For example, if you’re making gluten-free cookie dough, it may feel softer than you’re used to at first. Instead of adding more flour, let the dough rest for 15 to 30 minutes. As it sits, the flours and starches will continue to absorb the liquid, creating a smoother texture and a more cohesive dough.
As a general guide, batters benefit from resting for about 15 to 30 minutes, while doughs often need just a short rest before shaping.
5. Binding it All Together
If you’ve spent any time reading about gluten-free baking, you’ve probably come across the word binder. It gets used often, and not always clearly, which can make it feel more complicated than it needs to be.
At its core, a binder helps hold your baked goods together. In traditional baking, gluten provides that structure and elasticity. In gluten-free baking, binders step in to help create cohesion, so your bake doesn’t crumble or fall apart.
Binders work by forming a network that helps trap moisture and give your batter or dough more stability. This is what allows a slice of bread to hold together, or a cookie to keep its shape instead of spreading too much.
There are a few common types of binders used in gluten-free baking:
- Xanthan gum is one of the most widely used. It helps create elasticity and gives baked goods a more cohesive texture.
- Guar gum works similarly, though it can produce a slightly softer structure.
- Psyllium husk absorbs liquid and creates a gel-like consistency, which can improve both structure and moisture retention, especially in breads.
It’s important to use the right amount. Too little binder can lead to crumbly, fragile results, while too much can create a dense or slightly gummy texture.
It’s also worth noting that ingredients like eggs can contribute some binding and structure, but they typically aren’t strong enough on their own to fully replace gluten. This kind of understanding is a core part of pastry training, where students explore how each ingredient functions and why it’s used in a specific recipe.

Refining Texture with Moisture in Your Bakes
Once your flour blend, hydration, resting, and binders are in place, moisture becomes a way to further refine texture as you explore or develop recipes. Unlike hydration, which ensures your flours and starches absorb enough liquid to function properly, moisture is about improving softness and overall mouthfeel.
Adding moisture-rich ingredients like yogurt, applesauce, eggs, or fats can help soften the crumb and reduce any slight dryness or graininess. Eggs are a good example of how ingredients can play multiple roles. They can add moisture, but also contribute structure and stability as mentioned earlier.
If you’re following a gluten-free recipe, take a moment to look at how moisture is built into it. Does it include a mix of liquids, fats, or moisture-rich ingredients? Well-developed recipes tend to layer these elements rather than rely on just one.
As you gain more experience, you can start to adjust proportions or swap ingredients with a better understanding of how each one affects the final texture.
Troubleshooting Gluten-Free Texture Issues
| Problem | What’s Likely Happening | How to Fix It |
| Gritty or sandy texture | Flours aren’t fully hydrated or are too coarse | Increase liquid slightly, let batter rest longer, or adjust your flour blend |
| Dry or crumbly | Not enough moisture or structure | Add moisture-rich ingredients or a small amount of binder, and check measurements |
| Dense or gummy | Too much starch or binder, or too much liquid | Reduce starch or binder and rebalance liquids |
| Falls apart when sliced | Not enough structure to hold it together | Increase binder, eggs, or adjust flour blend for more stability |
Bringing It All Together: Better Texture Starts with Understanding
In traditional baking, understanding what ingredients like flour, eggs, sugar, and liquids do in a recipe can make the difference between following instructions and truly knowing how to bake. In gluten-free baking, that understanding becomes even more important. Without gluten to rely on, every ingredient plays a more defined role in creating structure, texture, and balance.
As you continue baking, you may start to notice patterns. You’ll recognize how different flours behave, how hydration affects texture, and how small adjustments can change the final result. What once felt unpredictable might become something you can control.
If you find yourself drawn to that process, experimenting with ingredients, refining recipes, and understanding the “why” behind each step, it may be worth exploring a deeper education in baking and pastry. Developing those skills can open the door to more consistent results, greater creativity, and a stronger foundation in the kitchen. Contact us to find out how a culinary education might fit your goals.
INTERESTED IN LEARNING MORE? CONSIDER THESE ARTICLES NEXT:
- What Is Gluten-Free Bread and How Is It Made?
- 10 Skills Every Baker Should Have
- How Online Pastry School Works
FAQs
Grittiness usually comes from flours that haven’t fully hydrated or are too coarse. This can happen if there isn’t enough liquid or if the batter hasn’t rested long enough. Improving hydration, letting the batter sit before baking, and using a balanced flour blend can all help create a smoother texture.
Dryness often means there isn’t enough moisture or the ingredients aren’t balanced properly. Try incorporating moisture-rich ingredients like yogurt, applesauce, or additional fat, and make sure your measurements are accurate. A well-balanced flour blend and proper hydration also play a big role in preventing dryness.
Yes, resting is an important step in gluten-free baking. It gives the flours and starches time to fully absorb liquid, which improves texture and reduces grittiness. Even 15 to 30 minutes can make a noticeable difference in the final result.
There isn’t a single “best” blend, but most successful recipes use a combination of base flours, starches, and supporting flours. A good starting point is roughly 60–70% base flour, 20–30% starch, and a small amount of supporting flour. The goal is balance, not relying on one ingredient alone.
This usually means there isn’t enough structure in the recipe. Adding or adjusting a binder, increasing eggs, or improving your flour blend can help hold everything together. Proper hydration and resting time also support a more stable crumb.
Yes, it often feels softer, stickier, or looser than traditional dough. That’s normal and usually a sign that the dough is properly hydrated. If it feels firm or similar to wheat-based dough, it may actually be too dry.